
In a previous post, we shared the most common challenges Salesforce admins and developers face when it comes to Salesforce org performance and speed. Now, we’ll show you how to benchmark and measure Salesforce org process times for determining where maintenance and improvements are needed.
Using the Developer Console to Measure Salesforce Org Process Performance
In order to figure out whether you’re making significant improvements to your Salesforce org process performance, you must have a starting point to work from. That starting point is your benchmark. Fortunately, the Developer Console makes benchmarking easy.
Accessing Salesforce “Debug Logs”
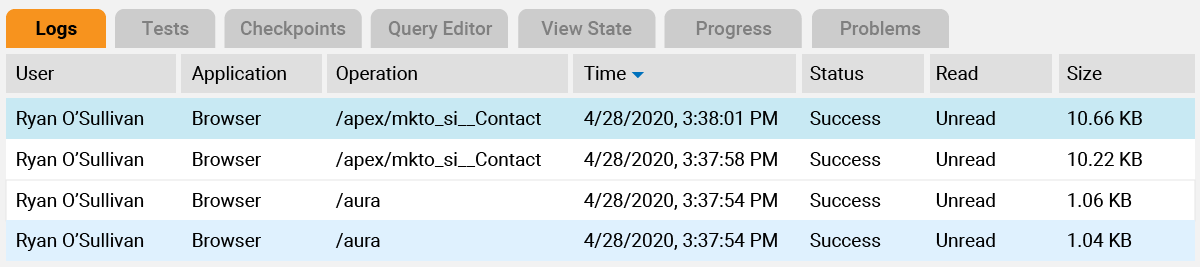
Whenever you interact with Salesforce, be it saving a record or initiating a flow, you can choose to access the “debug logs” for each process.
These logs contain a lot of information with regard to what’s happening behind the scenes when you press the “save” button. Within this information is an abundance of useful insights, like how long each process is taking.
Admins, don’t be intimidated by the Developer Console. By following these steps, you’ll see just how easy it is to navigate:
- Open the Developer Console from the top, right corner of your screen. (Note: you must be an Admin to see this.)
- Once the Console is open, try performing whatever process keeps stalling or is taking longer than it should.
- You should start seeing the logs appear in the Developer Console.
Finding Relevant Log Data
Now that you have some information to work with, it’s time to dig into the logs and start gathering insights that will help you improve your Salesforce org process performance. Specifically, you’ll want to look at how long it took for a process to run and what’s happening while it’s running.
Here’s how:
- Click on the log that first appeared when you started performing your process (or click on the largest, most recent log, which can be determined by the “Size” column).
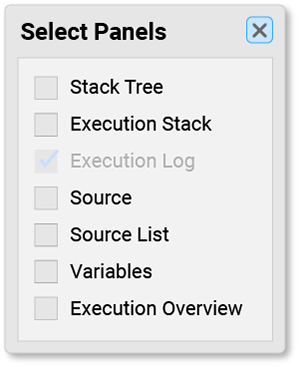
- You will likely see what appears to be a bunch of gibberish; in order to turn it into useful information for benchmarking, click “Debug,” then click “View Log Panels.
- A dialog box should now be visible. (Note: you can also select Ctrl-p to open the dialog box.)

Setting Your Process Performance Benchmark
Now that you have the dialog box open, it’s time to start benchmarking. Benchmarking is the process of understanding how long something takes, using a reference point. This reference point is your benchmark; the base amount of time a process normally takes. If our goal is to reduce processing time, a time below our benchmarked time would be considered a win.
Benchmarks will enable you to measure Salesforce org process performance so you can carry out proper maintenance.
Let’s get started:
- Click “Execution Overview.”
- When the new window opens, click “Timeline.”
- A screen will appear that looks similar to the following:
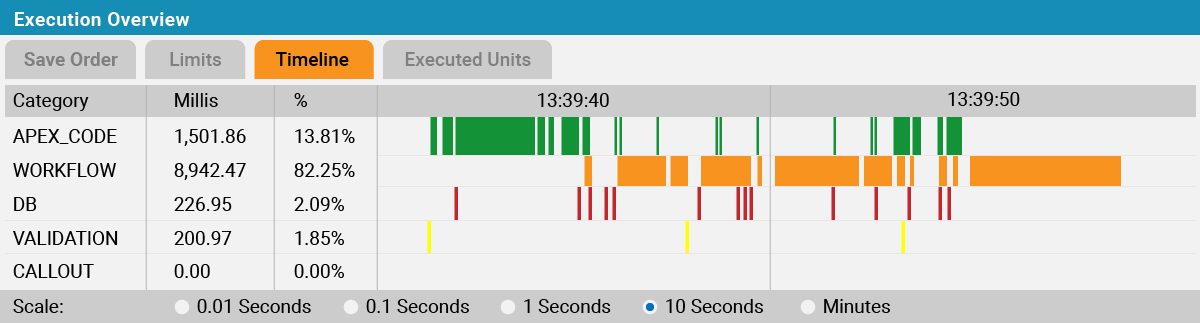
In the example “Timeline” screen, you can see that the selected process was in the “Workflow Phase” for most of its duration. On the left-hand side, in the “Millis” column, the data shows that the Workflow Phase took approximately 8,000 milliseconds.
If this seems too long for the given process, you have a starting point for tackling your Salesforce org process performance and speed issues.
NOTE: In this example, the timeline is bouncing frequently between the “Workflow” and “Apex” rows. This indicates that some recursive behavior may be at play, so that’s something you can investigate further and perhaps eliminate.
To be clear, the numbers generated in the timeline aren’t always 100% accurate. As such, whenever possible, it makes sense to run through this process for each problematic process about 5 times and use the average to determine your benchmark.
Having measurements and data in hand empowers you to begin making targeted changes that speed up your Salesforce org processes.
After you feel you’ve made some progress, run through the steps again and take note of the new timeline. Ideally, your processes should start taking much less time.
Wrap Up
When working to improve your Salesforce org performance, it’s important that you’re targeting the right issues and making the most of your time and efforts. If you’ve gone through each step in this blog post, you can now measure Salesforce org process performance and speed, which is an important step toward determining necessary maintenance and improvements.
Have questions about this blog or how to improve your Salesforce org? Sign up for our newsletter! We send out a monthly recap of our latest Salesforce content, including articles on security best practices, actionable insight on Salesforce optimization for enterprises, and more.